The deck editor
The deck editor is used to lay out printed pages. It is most commonly used to:
- Prepare a deck of related components for printing.
- Design custom boards (when supported by a game’s plug-in).
- Make custom boxes for storing cards and tokens.
Quick start
A tour of the deck editor
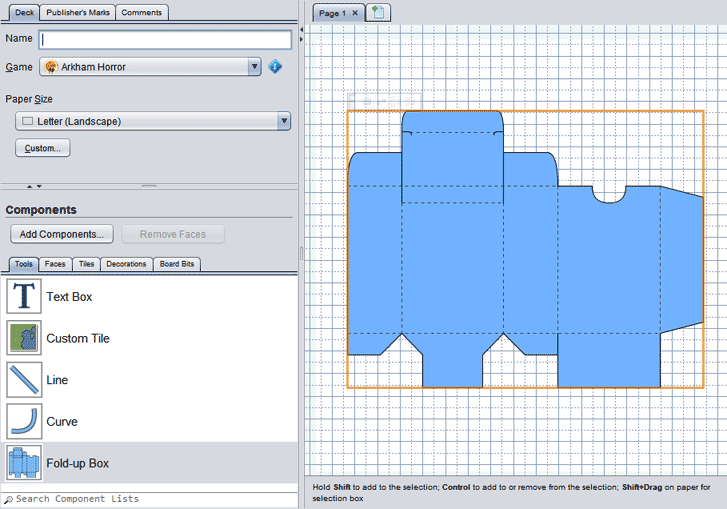
The deck editor has three basic parts. The upper left corner controls the deck’s basic properties, such as paper size and crop marks. Below that are objects that can be added to the deck, including shapes, text, game components, and game-specific tiles and decorations. On the right side is the design area. You can add, switch between, and organize pages using the tabs above the design area.

Moving around the page
To move to different parts of the page into view, left click on the paper and drag.
To zoom in or out, use the mouse wheel or + and - keys.
Adding objects
To add objects to the deck, drag them from the lists to the page.
To add game components, first drag and drop the .eon file onto the object lists, or click Add Components.
Editing objects
To select an object, left click on it. Hold Shift to add objects to the selection.
To select an area, Shift + left click on the paper and drag.
To move and object, left click on it and drag or use the arrow keys. When you drop an object over an existing object, it may snap into place as indicated by a blue rectangle. For the most part it just does the right thing and you don’t need to worry about it.
To edit an object’s content, double click on it.
To change the object’s style (such as line colour), right click on it and choose Style.
About the Game setting
To set the game associated with a deck, choose the game from the Game dropdown of the Deck tab. Setting a specific game is usually only relevant if you want to design a game board. The default is All Games, which is all you need if you are creating a deck of cards.
Changing the Game adds game-specific content to different parts of the deck editor:
- new objects (and new categories of objects) to add to deck pages;
- new paper sizes for things like custom game boards;
- new sizing helpers for use with the Fold-up Box tool.
Not all games add new content, or add every possible kind of new content.