Exporting images
Most game components can be exported as images using the File/Export menu item. You can choose how the images will be packaged (for example, you might combine them into a ZIP archive). You can also choose options such as the image format and resolution, either manually or automatically based on the intended use.
Ink Saver mode applies to all printed and exported images. Be sure to turn it off before exporting your final version!
The first step is to choose a Destination. This determines how the files are stored. Two destinations are built in:
Files in a folder
Exported files are saved in a folder of your choice.
ZIP archive
Exported files will be saved in a .zip archive in a folder of your choice.
Plug-ins can add additional destination options. Some of these may have additional settings that you can configure by choosing Destination Options. For example, a destination that uploaded the export to an image sharing service might let you specify your account credentials here.
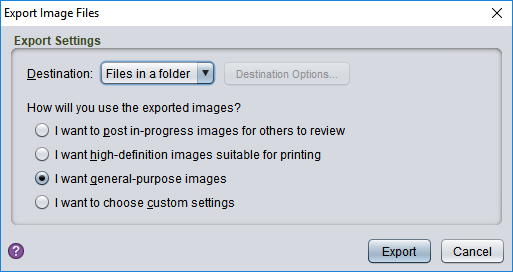
The second step is to choose the format and quality of the exported images. The first three options let you pick settings automatically based on what you want to do with the images. The last option lets you choose all options yourself (see below for details). The basic options are:
I want to post in-progress images for others to review
Create medium-sized, medium-quality images that are large enough to be legible but still download quickly. Simple card backs will be omitted.
I want high-definition images suitable for printing
Create large, high-quality images. Files typically take up 50–100 times more disk space than those produced by the first option.
I want general purpose images
Create images in between the first two options. They will take up only a little more space than the images produced by the first option, but the quality is sufficient that you could print them if you had to.
Choose Export to create the images. Depending on the destination, you may be prompted for more information. For example, if you are exporting to a ZIP archive, a file chooser will be displayed so you can choose the folder and file name to use.
Custom image format settings
For complete control over the image format, select the custom settings option. The dialog will expand to display detailed format options.
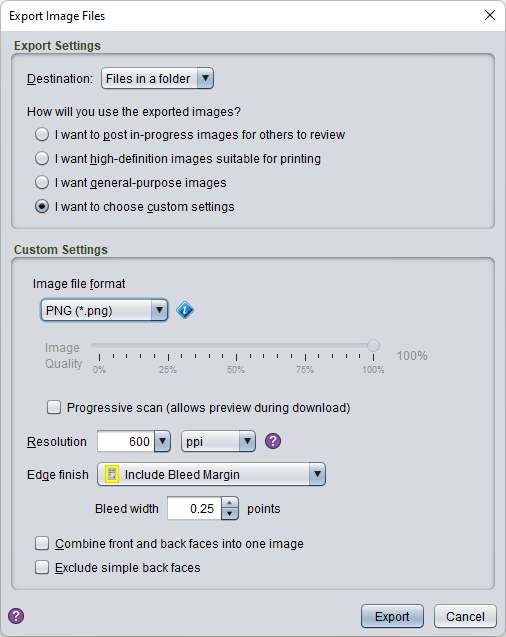
File format
Choose from PNG, JPEG, JPEG 2000, BMP, or GIF. PNG image files are generally larger than the other image types, but they will reproduce the image exactly (they are lossless). JPEG images are generally smaller, but do not reproduce the image exactly (they are lossy). JPEG 2000 images can either be lossy or lossless, and are typically smaller than either PNG or JPEG files. However, they are not as widely supported by other applications. BMP and GIF files are outdated image formats and should only be selected if you need to work with a tool that doesn’t support a better format.
Transparency: Some components produce images with transparent areas. The most common example is a component with non-rectangular edges. The JPEG format does not support transparency and will have a solid colour background added automatically. (JPEG 2000 does support transparency.)
Image quality
This slider controls the compression level for lossy formats. Higher quality means a more accurate reproduction but also a larger file size. For JPEG 2000, the 100% quality setting results in lossless images.
Progressive scan
When checked, the image is saved in multiple passes. When shown in a Web browser, a low quality version of the image will appear immediately and improve progressively until the entire image is downloaded. Progressive scan images can be larger than regular images, especially for the PNG format.
Resolution
The resolution that the images are drawn at. Higher resolution images are higher in quality because they use more pixels to represent the same physical area. Resolution is measured in pixels per inch (ppi) or pixels per centimetre (ppcm). Typical resolution for print purposes is 300 ppi. Typical resolution for screen use is 150–200 ppi.
Edge finish
This lets you choose whether or not to include a bleed margin as part of the exported faces, where supported by the component face. If you choose not to include a bleed margin, you can select squared or rounded corners. Rounded corners may be more aesthetically pleasing, especially if the images may be viewed against coloured or textured backgrounds. However, for this option to work as intended you must choose an image format that supports transparency (not JPEG). It may also significantly increase the image file size. (Some faces are meant to have square corners, in which case choosing rounded will have the same effect as choosing squared.)
Combine front and back faces
When checked, front and back faces of the same component will be joined into a single image. You can then print this image and fold along the join to make a two-sided card.
Exclude simple back faces
Many game components have a simple back face that consists of a either a fixed image or are an identical copy of the front face. Checking this option skips these simple faces.
The Combine front and back faces and Exclude simple back faces can’t be selected at the same time.
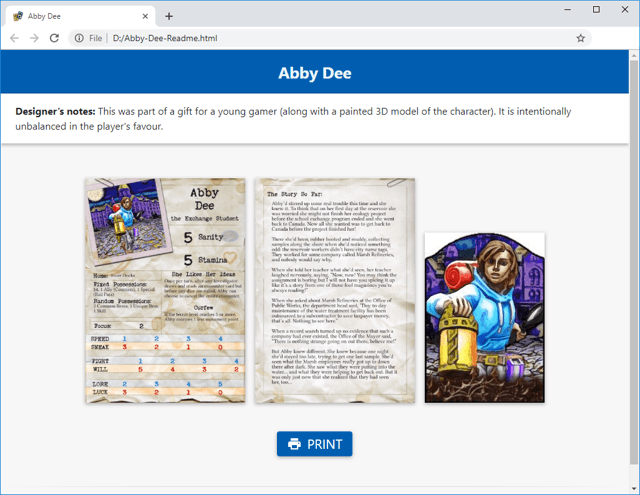
The “Readme” file
Along with your images, the export will also include a Web page with a file name ending in “Readme”. This can be a great way to share your content. You can put a printable version of your component on the Web just copying this file (and the exported images) onto a Web server!
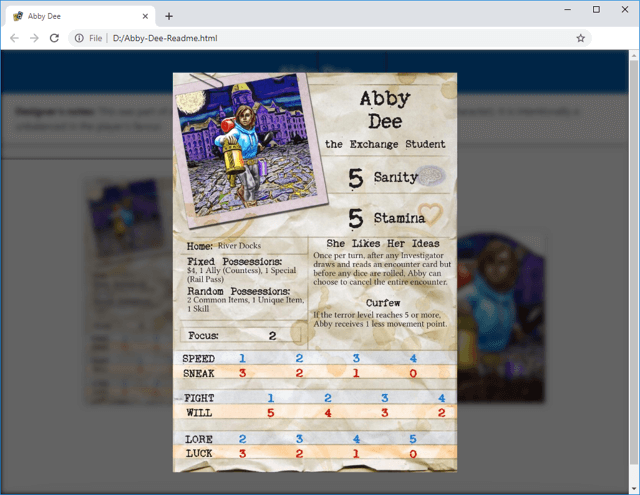
Viewing the component
Opening the Web page in your browser will display the name, any design comments you may have added, and previews of each of the exported images.
If you export to an image type that is not widely supported by Web browsers, you will see a list of download links for each of the images instead. For best results, choose PNG or JPEG.
Clicking on an image or pressing Space will display a larger version. You can press ← and → to move between images. Clicking again, or pressing Esc, will return to the previous view.
Printing the component
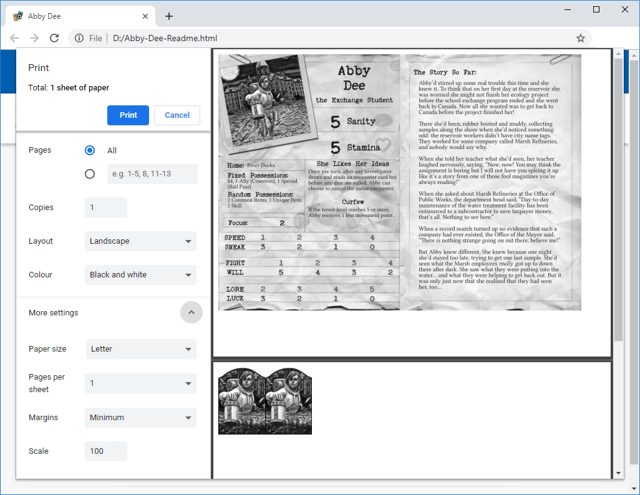
Your exported component can also be printed from the Readme page, just by choosing the Print button. The result should print at the correct size, although it may use more pages than Strange Eons would when printing the same file. If the printed size is wrong, check for a setting like “Scale” in the browser’s print options, which should be set to 100%. You may also want to switch to landscape layout, turn off any header/footer options, and adjust margins to fit more content on the page.
If an image is split over two pages (but the image is smaller than the size of a page), your browser does not correctly support the
page-break-insideCSS property. You will need to update the browser or use a different one.